|
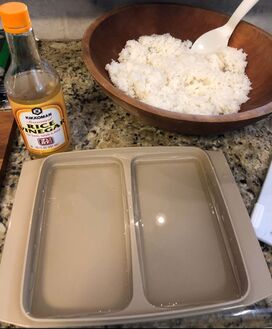
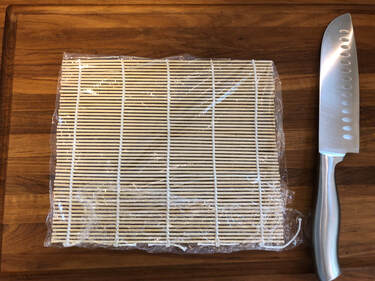
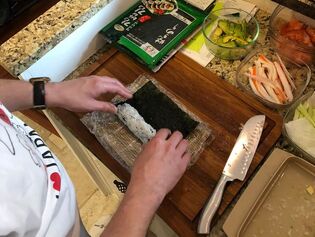
Rolling futomaki (large) and maki (small) rolls is a fun and creative process. When the rice has cooled and the filling ingredients are prepared, you can move forward to making sushi rolls. In general, you should make two to three futomaki rolls or four to six maki rolls per person. Having the right tools for rolling will make the process as easy as possible. There are a few preparation steps before actual creating a roll. Preparation for Rolling Sushi Before making rolls, you should prepare rolling space on a countertop or table. Begin with wrapping a bamboo rolling mat with plastic wrap. This will keep rice from sticking to the bamboo mat. Next, mix a splash of rice vinegar with water in a bowl or dish wide enough for dipping a knife. You will want to dip the cutting blade of a knife in the water mixture to prevent rice from sticking to the knife. Also, I recommend having ingredients in different containers as seen in the photo below.
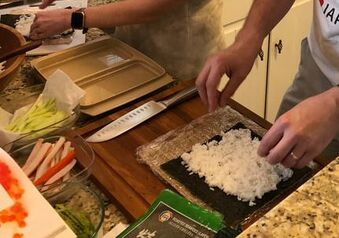
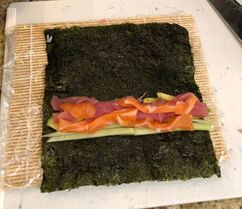
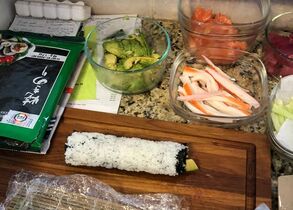
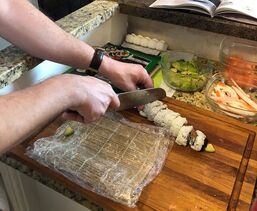
Rolling Futomaki There are a few steps for rolling futomaki: 1. Take a full sheet of seaweed paper (nori) and lay it shiny side down on a bamboo mat. 2. Cover 2/3rds of the seaweed paper with a thin layer of sushi rice. 3. Lay ingredients together across the roll. Try not to overfill a roll. 4. Begin rolling the mat away from you by forming a tight circle around the ingredients. Press firmly across the mat when the ingredients are fully wrapped. You will roll about 1/3rd of the seaweed paper around the ingredients. 5. Once the ingredients are firmly pressed, continue rolling the rest of the sushi roll until the entire roll is wrapped. Press firmly across the mat again once everything is rolled together. 6. Unwrap the mat and transfer the roll to a cutting board. 7. Dip a sharp knife into the water and rice vinegar mixture and shake off any excess water once removed. 8. Cut the ends of the roll off to create uniform circled ends. Next, cut the roll into even pieces (between 6 and 8). 9. Transfer the pieces to a platter for serving. Inside-Out Rolls Creating rolls with rice on the outside is very easy. Follow steps 1 and 2 for making futomaki rolls, but put the seaweed sheet shiny side up. Next, flip the rice-covered seaweed paper over prior adding ingredients. You can also sprinkle sesame seeds on the rice before flipping the seaweed paper over. Continue to follow steps 3 - 9 to create a sushi roll with rice on the outside and nori on the inside.
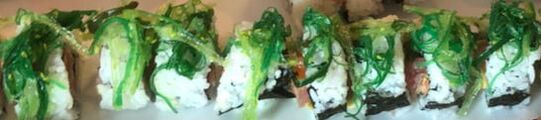 Step 9: Transfer to a platter Rolling Maki To create maki rolls, you will follow the same rolling steps as futomaki. The only exception is that you will use half of a sheet of seaweed paper. Cut a piece of seaweed paper in half (widthwise) and place it on a bamboo mat. Try using only one or two ingredients for maki rolls. They should be made as sushi pieces eaten in one bite.  Making a maki roll To view the more blog posts in this multi-part series on making sushi at home, click the links below:
Making sushi at home requires a large amount of preparation work. There are multiple ingredients that require additional steps beyond purchasing them. Fortunately, you will have idle time while the sushi rice cooks in a device and cools to room temperature. I will cover some of the most common preparation steps for creating sushi rolls. Cutting Individual Pieces of Fish When purchasing sashimi grade salmon or tuna, you will likely buy one large fillet at the market. This piece of fish needs to be cut into bite-sized pieces for nigiri, sashimi, and sushi rolls. There are right and wrong approaches to cutting sashimi grade fish. I recommend watching videos on YouTube to learn how to correctly cut fillets with a knife. There are many helpful videos such as this one. In addition, you may want to sharpen your knife prior to starting this process. 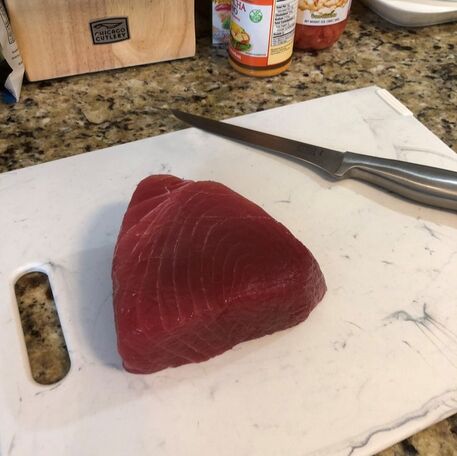 Sashimi grade tuna Cutting and Peeling Vegetables While this may seem obvious, vegetables require preparation. Cucumbers require peeling, deseeding, and slicing into strips. Carrots require peeling and shaving into thin pieces. Avacados should be cut into long, thin strips to fit into rolls. You should try to make individual pieces small for layering in sushi rolls. Other options include jalapenos (deseed), daikon radishes, asparagus, shiitake mushrooms, yams, and picked vegetables. 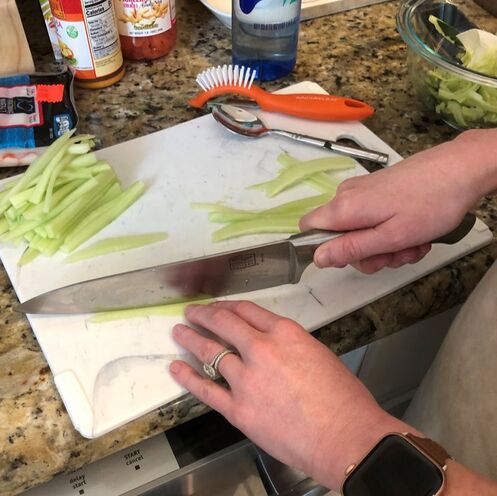 Preparing cucumber slices Preparing Cooked Ingredients Some ingredients for sushi rolls require cooking. Examples include seared scallops and tempura fried shrimp. I recommend cooking ingredients while the rice cools to room temperature. You should have around an hour to work on other kitchen preparation prior to making sushi rolls. 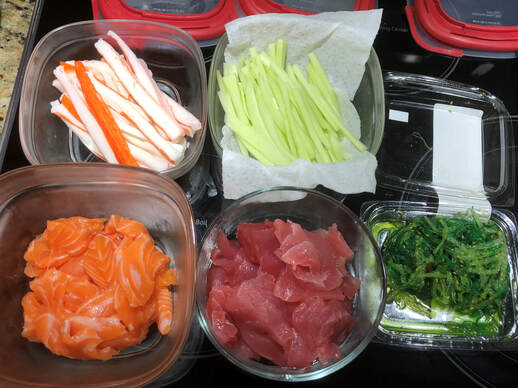 Prepared ingredients Setting the Table One other step that requires preparation is setting the table for a sushi dinner. It can take quite a bit of time to lay out all of the dishes, glasses, and serve ware. This preparation can be done at any time, including prior to making sushi rice. To view the more blog posts in this multi-part series on making sushi at home, click the links below:
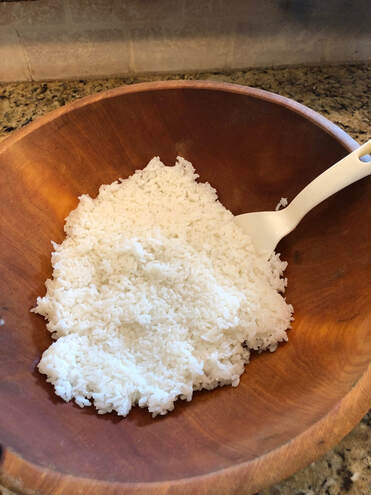
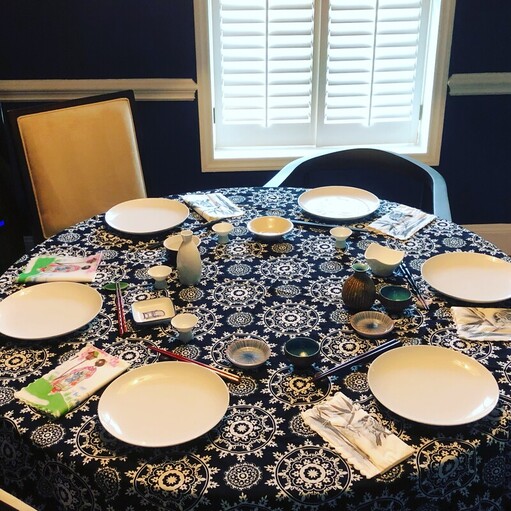 Table set for a sushi dinner Sushi rice is critical to the overall success for creating various rolls. The process for homemade sushi starts with the rice due to its time requirement. You will have to wash, cook, mix in vinegar seasoning, and cool the rice before using it. These steps require ample time to complete. How Much Rice Do I Cook? Before cooking the rice, you need to estimate how much is needed per person. I recommend preparing 1 cup of uncooked rice per person. This will produce 2 cups of cooked sushi rice. I use one cup of cooked rice on a full sheet of nori (seaweed) paper. Each person would get two futomaki (full-sized) sushi rolls. If you wanted to make maki, small bite-sized rolls, use half of a nori sheet. I also recommend adding a little extra uncooked rice to your estimated amount. Whenever I make sushi rice, some always gets stuck to the bottom of a pot or spread too thick on a nori sheet. Preparing Rice for Cooking Before you can cook the rice, you will need to wash it. I recommend putting the rice in a pasta strainer or bowl that has holes small enough to not let rice through. While rinsing the rice, use your hand to gently move around the grains. This ensures that all of the grains are washed thoroughly. You should continue rinsing the rice until the water running through it turns clear. Once the rice is rinsed, move it to a bowl or into the stainless steel pot of an Instant Pot. Fill the bowl or pot with enough water to submerge the rice. Allow the rice to soak in the water for at least 30 minutes. Next, drain the water and then transfer the rice to a rice cooker or Instant Pot. I recommend avoiding the use of a stove top pot to ensure consistency. Ensure that your cooking device is large enough to cook the amount of rice intended. The rice will expand while cooking. You can prepare multiple batches if your rice cooker or Instant Pot is not large enough for the intended amount of cooked rice. 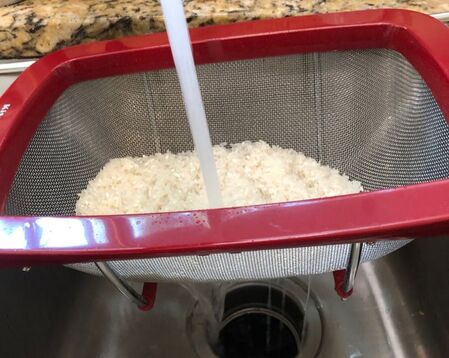 Washing the rice Cooking the Rice Once the soaked rice has been transferred to a cooking device, add 1.2 to 1.5 cups of fresh water for each uncooked cup of rice. Your rice bag may have similar directions on it. Once enough water is added, hit the rice option on the rice cooker to start the cooking cycle. If you are using an Instant Pot, hit the rice setting with low pressure. The machine will run through a 12 minute cycle once the timer appears. When the cooking time is complete, allow the Instant Pot's pressure to naturally release for 10 minutes. 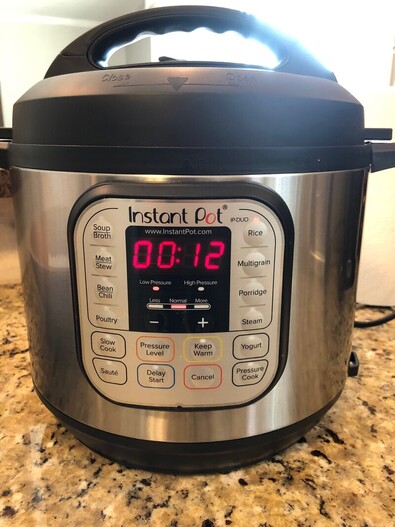 Instant Pot timer Adding Seasoned Rice Vinegar When the rice has finished cooking, transfer it preferably to a wooden bowl. If you do not have a wooden bowl, a glass one is an alternative. Measure out an appropriate amount of seasoned rice vinegar to add to the cooked rice. I recommend 1/2 tablespoon for each cup of cooked rice. If you made 10 cups of cooked rice, you would add 5 tablespoons of rice vinegar. This amount can vary depending individual preference. After measuring the amount of seasoned rice vinegar, you can begin adding it to the rice. Gently stir the rice with a wooden spoon as you slowly pour in the seasoned rice vinegar. Once all of the seasoned rice vinegar has been added, you will notice the rice has a sheen to it. This is completely normal. In addition, the rice will become very sticky after adding the seasoned rice vinegar. The Cooling Process The final step to making sushi rice is to let the cooked rice cool to room temperature. The time necessary to cool will vary with the volume of cooked rice. In my experience, this process will take 1-2 hours. You can use a fan on the rice to cool it down faster if time is limited. When the rice has finally cooled to room temperature, it is ready to use for making homemade sushi. To view the more blog posts in this multi-part series on making sushi at home, click the links below:
 Sushi rice |

Follow Me
on Instagram @card_knock_life Categories
All
Archives
February 2024
This website contains affiliate links to TCGPlayer
|

 RSS Feed